How to Guide

The following pages will give you some basic information and help you perform procedures related to your therapy. Not all the information may relate to you and your treatment. Please understand that this is general information, and in certain situations, you may have individualized needs. In every case, if you receive information from your health care provider that is different, please follow their recommendations.

We recommend seeking professional instructions for certain procedures so that the doctor or nurse can verify that you are performing them correctly. Procedures such as sterile dressing changes, injections, use of butterfly needles, and others require a certain amount of expertise and you can injure yourself or cause an infection if you have not been taught to perform them correctly.
Infections in patients that have an IV access (PICC lines, ports or peripheral IVs) can be very serious, even life threatening. Handwashing is the one thing you can do that is most effective in preventing infections. We recommend following the following guidelines, endorsed by the Centers for Disease Control (CDC).
  1. Turn the faucet on and adjust the water until it is comfortably warm. Do not use water that is too hot – it tends to open the skin pores and remove skin oils. Repeated exposure to hot water may increase the risk of dermatitis.
  2. Wet hands and wrist thoroughly with water.
  3. Apply a liquid antimicrobial soap as recommended by the manufacturer and lather well.
  4. Rub hands together vigorously, for at least 15 seconds covering all surfaces of thehands and fingers. (If you sing the “Happy Birthday” song twice to yourself whilewashing, that should do it!)
  5. Rinse hands with water and dry with a clean, disposable paper towel.
  6. Use the paper towel to turn off the faucet.
There are many different protocols for flushing your IV access and this depends on several factors. What type of line do you have (PICC line, port, peripheral line?) How are you using your line – continuously or intermittently? Is it one lumen or two? What type of catheter is it? What solutions does your doctor want you to use – saline alone or saline and heparin? Following are general guidelines for flushing – for more specific information, please consult your healthcare provider.

Infuserve America provides prefilled saline and heparin flushes for your convenience. They are ready to use; the solution is already in the syringe.
  • 1. Wash your hands.
  • flushing iv access supply
    2. Gather your supplies. This should include alcohol wipes and your flushes.
    flushing iv access supply
    3. Vigorously wipe the end of your connector attached to your line with an alcohol prep.
    flushing iv access supply
    4. Take the syringe out of the outer plastic bag and remove the cap. Very Important: The end of the syringe must not touch anything else once the cap is removed! (The end of the syringe must remain sterile.)
    flushing iv access supply
    5. The syringe may have a little air bubble in it. By holding the syringe upright with the plunger at the bottom you can gently push up on the plunger and until the air bubble is gone and you see a drop of the solution come out the tip.
    flushing iv access supply
    6. Attach the syringe to your connector at the end of your line. Do this by holding the connector in one hand, and twisting the syringe on, so it does not come off. You will need to exert some pressure to twist it on. The syringe should stay attached to your line when you let go.
    flushing iv access supply
    7. Exert pressure on the plunger of the syringe to flush your line. The fluid should empty into your line with only slight pressure. Should you feel significant resistance and are not able to flush, contact your Healthcare Provider.
  • 8. These syringes are one-time use only. You should not re-use a syringe as this will not maintain sterility.
  • If you are infusing a medication, you will connect the end of your tubing in the same way you attached the flush syringe – it will twist on. Be sure to wipe your connector vigorously with an alcohol prep before connecting!

    You will always precede and follow medication with a saline flush. Heparin is used in some cases to maintain the patency of your line (keep your line open.) This would be used after the second saline. There is an acronym to help you remember: SASH

    Saline, Additive (the medication), Saline, Heparin
    Swabcap poster
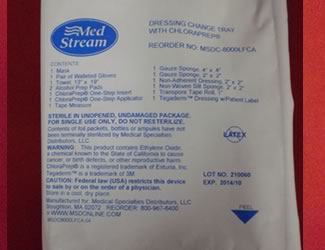
    A central line (PICC, port, Hickman or other tunneled catheter) dressing change is a sterile procedure. Because of this, we strongly recommend that you receive training by a healthcare professional familiar with central line care and maintenance. There are many subtle ways a sterile surface can become contaminated, which puts you at risk for blood stream infections. These infections can be very serious, and even life threatening. The central line dressings should be changed a minimum of every seven days – every 48hr if gauze is used. If at any time the dressing peels, becomes wet underneath, becomes dirty, etc. it should be changed immediately. All components that can be changed (extension sets, connectors, securement devices, etc.) should be changed whenever a dressing change is performed. As always, follow your healthcare provider’s recommendations for the care and maintenance of your line. Below is a description of the components in a standard dressing kit, and how they are used.
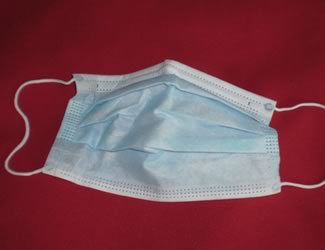
    Mask

    1. Mask

    Used by the person changing the dressing – usually not the patient. Have the patient turn their headaway from the area to avoid breathing directly on the area.
    Sterile Gloves

    2. Sterile Gloves

    These are put on in a special way after you have finished touching anything that does not have to be sterile. Anything you touch after the gloves are applied must be sterile.
    Towel

    3. Towel

    To be used as a drape for a sterile field.
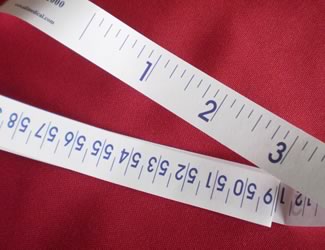
    Tape Measure

    4. Tape Measure

    Some agencies and healthcare providers recommend measurements be taken of the catheter to make sure it has not moved in or out too much.
    Alcohol Swab Stick

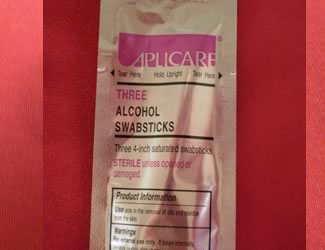
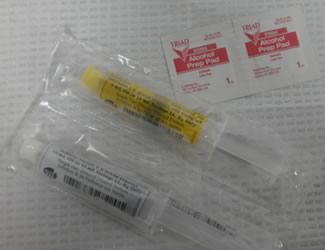
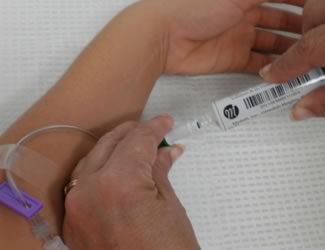
    5. Alcohol Swab Stick

    This is meant to be used to clean the catheter as it sometimes becomes sticky with the adhesive from the dressing. It is not meant for your skin.
    Chloraprep Sponge Stick

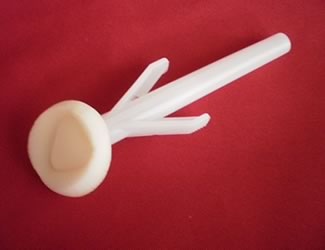
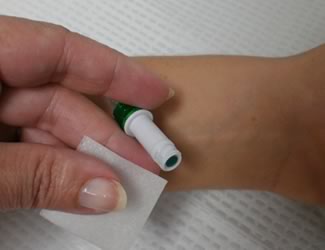
    6. Chloraprep Sponge Stick

    After squeezing together the “wings” on the stick, an antiseptic is released and saturates the sponge. This is meant to be used at and around the site as a “scrub.” Use it with a back and forth scrubbing action. Allow to completely dry on the skin (do not wipe off.)
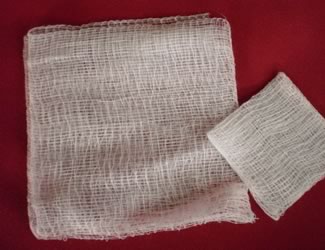
    gauze

    7. Gauze Pads

    Included for convenience – they are NOT meant to stay under the dressing. If gauze is used under the clear dressing, the entire dressing must be changed within 48hrs, as it can be a breeding ground for bacteria.
    Grip Lock Securement Device

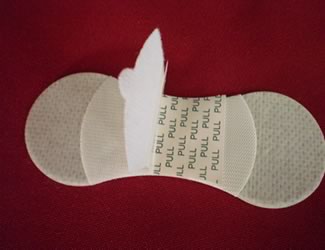
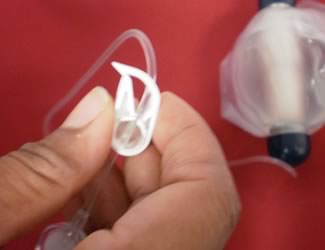
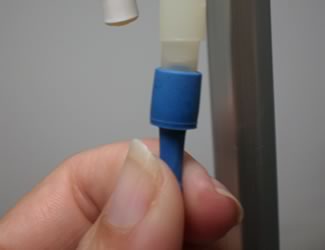
    8. Grip Lock Securement Device

    Used to secure the catheter from moving back and forth.
    Tegaderm CHG Dressing

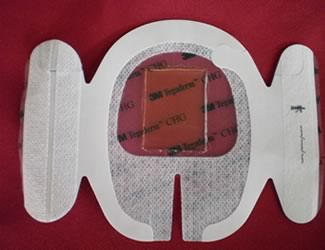
    9. Tegaderm CHG Dressing

    Used to cover the entire area. The gel pad with the antimicrobial is placed directly over the catheter insertion site. Make sure the area is COMPLETELY DRY before applying the dressing as covering a damp area can be a source of irritation. If the gel pad becomes very “squishy” and swollen after a few days, it is time to change the dressing.
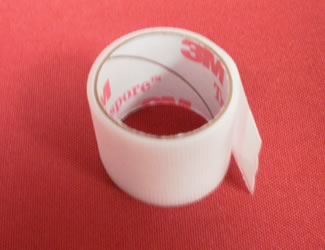
    Tape

    10. Tape

    Used to secure tubing as needed.

    Other Products

    Basic Dressing Change Kit

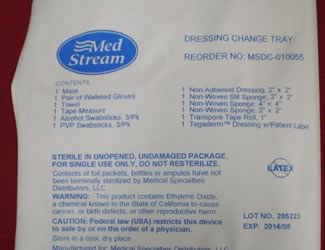
    1. Basic Dressing Change Kit

    Essentially the same components with the exception of the Grip Lock securement device and the Tegaderm CHG. This kit contains a basic Tegaderm dressing without the antimicrobial. To be used if you are using another securement device, another dressing, etc.
    Betadine Dressing Change Kit

    2. Betadine Dressing Change Kit

    This kit contains Betadine swabsticks instead of Chlorhexidine for those patients that are allergic to Chlorhexidine.
    It does not contain the Griplock (that may be purchased separately.) The Tegaderm in this kit does not contain CHG.
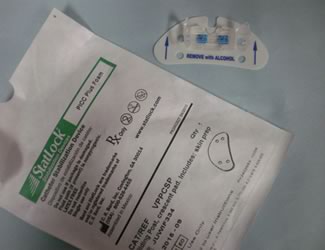
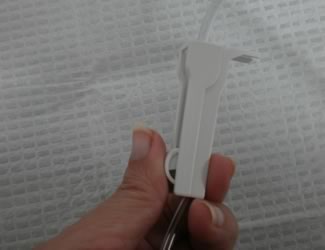
    Statlock

    3. Statlock

    A securement device that requires the “wings” of the PICC line be placed over the prongs of the device and then secured by flipping over the plastic pieces.
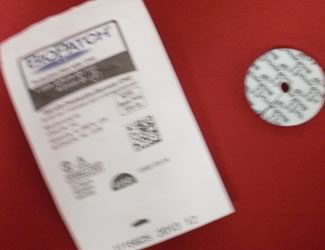
    Biopatch

    4. Biopatch

    An antimicrobial disc that is placed around the catheter site. This patch contains Chlorhexidine. It must be added to the sterile field in a sterile manner. It must be placed around the catheter with the BLUE SIDE UP. It should also be applied such that the slit on the disc is below the catheter and the catheter rests upon the slit, with the edges of the slit touching each other. Must be purchased separately.
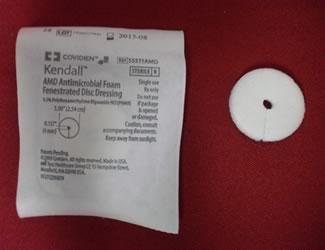
    AMD Disc

    5. AMD Disc

    Similar to the Biopatch except that it contains the antimicrobial Polyhexamethylene Biguanide (PHMB.) It can be applied with either side down. It should also be applied such that the slit on the disc is below the catheter and the catheter rests upon the slit, with the edges of the slit touching each other. It must be purchased separately and be added to the sterile field in a sterile manner.
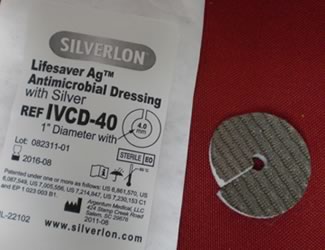
    Silverlon

    6. Silverlon

    Similar to the Biopatch and the AMD disc, but the active ingredient is silver. This product must first be ACTIVATED WITH STERILE SALINE BEFORE IT IS APPLIED. This must be done in a sterile manner, and dispensed on to the sterile field in a sterile manner. It is placed around the catheter with the SILVER SIDE DOWN. It is also is applied so the slit rests below the catheter and the edges of the slit touch each other. This is also a product that would be purchased separately.
    IV3000, Sorbaview, Reliamed

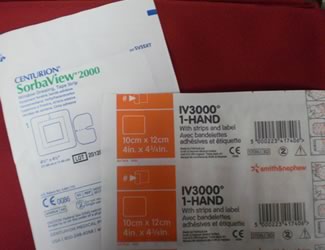
    7. IV3000, Sorbaview, Reliamed

    These are alternate dressings that could be tried if there is a sensitivity to the Tegaderm. In most cases, the Tegaderm is very well tolerated, particularly the Tegaderm CHG. If an irritation develops, often it is because the Chloraprep was not allowed to dry completely. However, some patients require a different dressing and these are two options. They are purchased separately.
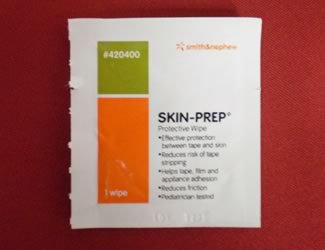
    Skin-Prep

    8. Skin-Prep

    Packaged in an individual pad applicator, similar to alcohol wipes, this product is applied to the skin after the site is cleaned and before the dressing is applied. It is allowed to dry and creates a “tacky” film which protects the skin from irritation due to the dressing. It should be applied to intact skin. Some patients find it increases irritation rather than diminishes it. It is purchased separately.
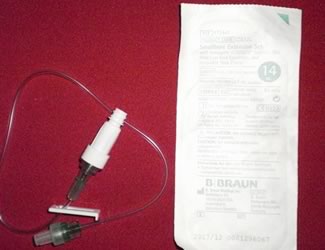
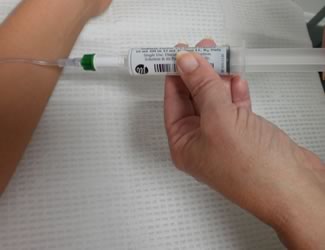
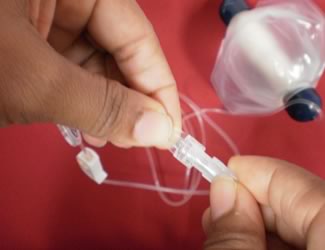
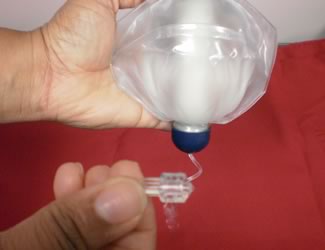
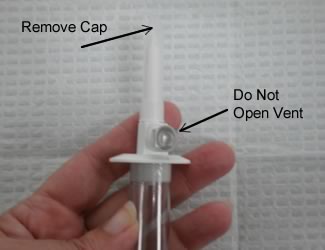
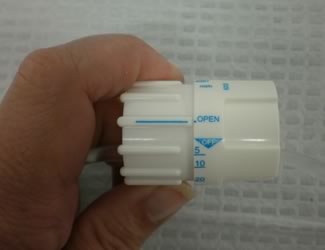
    Extension Sets

    9. Extension Sets

    Changed with every dressing change and comes with a needleless connector attached. Remember to flush the line with saline before attaching. The extension set should be attached directly to the catheter hub – no additional connector is necessary at the catheter. Purchased separately.
    Huber Needles and Connectors

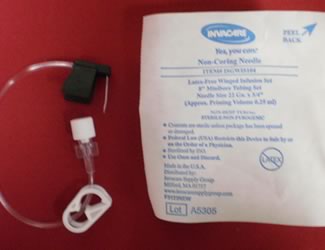
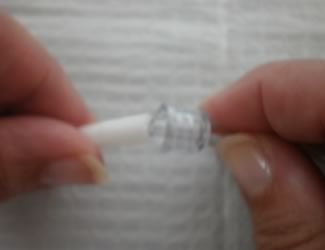
    10. Huber Needles and Connectors

    Used to access a port. The needles are right angled and come in various sizes. The needles come with an extension tubing attached, and require a needleless connector be added in order to connect and disconnect flushes and medication to the line.
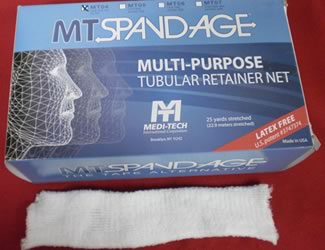
    Spandage

    11. Spandage

    Soft stockinet used to slip over the arm and hold the catheter and tubing in place. Does not need to be sterile, as it is used after the dressing is applied. Comes in a long roll, in different widths, and you would be cut the length you require. Purchased separately.
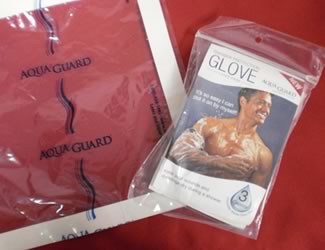
    AquaGuard

    12. AquaGuard

    Used to protect the dressing from becoming wet during a shower or bath. This product comes in a “sleeve” used for PICC lines and in a large square with adhesive around the edges used for tunneled catheters and ports. Purchased separately.
    Also known as “homeballs,” “ball pumps,”or “grenade pumps.” An elastomeric pump is a device that infuses medication once the tubing is unclamped. Built with an elastic balloon inside a very tough outer cover, the device pushes intravenous medication through tubing and a filter that is attached to the reservoir. The pharmacy fills the devices with your medication in a sterile environment then ships them to you, ready to use. It infuses at a specified rate. There are several advantages to infusing your medication in this way. The storage and stability of the drug is longer since these can be refrigerated or frozen, depending on the medication. The elastomeric pump does not run by gravity as a regular IV does. It is totally portable so you are not attached to an IV pole; it can be carried in a pocket or pouch. Because the device comes with tubing, you will not need to use additional IV tubing for the infusion, decreasing your expense and manipulation of the system, which decreases chances of introducing an infection.

    Directions for Use:

    1. As always before any procedures wash your hands according to the guidelines in this manual.
    2. Gather the supplies necessary. This should include medication in the pump, flushes as directed, and alcohol wipes. (If your medication has been refrigerated, allow 4-6hrs to bring to room temperature.)
    3. Check the medication label on the pump. It should have your name, the medication name, dosage, and expiration date. Please call Infuserve with any problems or discrepancies.
    Elastomeric Pump
    4. Check the integrity of the pump. It should not have any leaks, cracks or defects. Call Infuserve if you should see any of these.
    Elastomeric Pump
    5. You will need to“prime” the tubing (remove the air.) To do this, remove the cap at the end of the tubing, making sure the tip of the tubing does not touch anything else after the cap is removed. Hold the end of the tubing in your non-dominant hand while opening the clamp that is attached to the tubing, allowing the liquid to flow through until you see a few drops come out the end. Close the clamp and replace the cap on the end.
    Elastomeric Pump
    6. You are now ready to infuse your medication.Wipe the connector on the end of your IV line vigorously with an alcohol prep, or, if you are using a Swab Cap, remove the Swab Cap. Flush with saline as directed.
    Elastomeric Pump
    7. Wipe the connector again with another alcohol prep. Remove the cap from the end of the tubing on the pump and connect the line to your connector. Make sure you twist the end on snugly.
    Elastomeric Pump
    8. Open the clamp on your line and allow the fluid to run. Clamp
    9. When your infusion is complete, close the clamp on the tubing. Remove the tubing from your connector and throw away the pump and tubing.
    10. Wipe your connector with another alcohol prep and flush your IV access as directed. Cap with a Swab Cap.
    You will need to attach a tubing to your IV bag in order to infuse your solution or medication. This is called “spiking” the bag. Follow your healthcare provider’s instructions for how often you should use new tubing. In general, if you are infusing continuously, you should change your tubing every three days (except for TPN; that is changed every time you hang a new bag.) If your infusions are intermittent, (meaning they are interrupted and you are not infusing for a period of time – even a few hours) then you should change your tubing every 24hrs. You will always use a separate tubing if you are infusing different medications.
    1. Wash your hands.
    IV Bag part
    2. Gather your supplies. This should include your IV bag and tubing.
    3. Always check your medication label, making sure the information is correct – your name, name of the medication, dosage, expiration, etc. If there are any discrepancies, call us immediately.
    4. Your IV bag may be in an outer plastic covering. If so, peel off the outer packaging.
    IV Bag partIV Bag part
    5. The IV bag will typically have two “ports” at the bottom. These will look like small pieces of tubing that are part of the IV bag. One is used to inject medications into the bag and has a beige stopper on the end. This stopper does not come off. You will not be using this one. You will be using the IV tubing port.
    IV Bag partIV Bag part
    6. The cap of the IV tubing port pulls off. It may be blue or clear plastic. This is the port you will use to insert the end of the tubing. Hang your bag on the IV pole and pull off the cap. (Don’t worry, the fluid will stay in the bag!) Do not let the tip of this port touch anything else once the cap is off.
    7. Open the package with the IV tubing.
    IV Bag part
    8. You will see a roller clamp on the tubing. It will be open. Slide the roller to the bottom until it pinches the tubing. That is the “off” position.
    IIV Bag part
    9. Some types of tubing have a pinch clamp instead of a roller clamp. If this is the case, pinch the clamp closed.
    10. Identify the end of the tubing that attaches to the IV bag. The drip chamber will be on that end. This is the part of the tubing where you can watch the fluid dripping.
    IV Bag part
    11. Remove the plastic cap that is on the end of the tubing. This exposes a plastic “spike.” Do not let the “spike” touch anything once you have removed the cap. It should stay sterile, as it will go into the IV bag. (Note: There may be a vent on the drip chamber. Do not manipulate that; it is not necessary for your type of therapy.)
    IV Bag part
    12. While holding the port on your IV bag with your non-dominant hand, insert the spike. It will take some pressure, and you should continue to insert it until it will go no further.
    IV Bag part
    13. Squeeze the drip chamber a few times until it is 1/3 – 1⁄2 full of fluid.
    IV Bag part
    14. Remove the cap on the other end of the tubing. Don’t throw this away, as you will need to replace it momentarily. It is important that the end of the tubing not touch you or any other surfaces. It will attach to your IV access and must remain sterile.
    IV Bag part
    15. Now open the roller clamp on the tubing with one hand while holding the tip of the tubing with your other hand. You may want to hold this over a receptacle. Watch the fluid come out the end – when the air is out of the line you may close the roller clamp. Removing the air from the line is called “priming” your tubing. A few “champagne bubbles” in the line is fine, however, you should not have large bubbles in your line. Keep running the fluid through the line until they are gone.
    IV Bag part
    16. If you have bubbles 1⁄2 inch or larger, keep running fluid through the line until they are gone.
    17. Replace the cap on the end of the tubing. You are now ready to flush your IV access (see instructions) and infuse your medication.
    Using Vial Mates Poster
    1. Check to make sure your addEASE connector is firmly attached to the vial and the IV bag and has not yet been activated. #1
    2. To activate squeeze or flex the IV bag firmly while holding with the vial down. You may see a small white plug in the vial as the liquid begins to go into the vial. This is normal. #2
    3. Continue to squeeze and release the IV bag repeatedly until the vial is about half full of liquid. Do not overfill.
    4. Gently mix, so that the powder in the vial dissolves.
    5. Once the powder has dissolved, turn the unit around so that the vial is above the IV bag. Squeeze or flex the IV bag so that the liquid from the vial runs into the IV bag. A few drops of medication may remain in the bottom of the vial. #3
    6. You are now ready to spike your IV bag and begin your infusion.
    Important! Do not disconnect the vial from the bag after reconstitution. It can just hang there.
    Your IV medications are ordered to be given a certain way by your physician.

    Sometimes, medication is ordered to be infused with an elastomeric pump. If this is your situation, please see the instructions specific to this device.

    In some situations, the IV may be controlled by the roller clamp. Just adjust the clamp up to run the fluid in faster and down to slow it down. You will notice the droplets in the drip chamber of the tubing will indicate the speed at which the infusion is running. Please see the “Drip Rate Calculator” to determine the number of drops per minute you need to infuse your medication at the prescribed rate.

    Certain medications may be given by attaching a syringe to your line and pushing the medication in very slowly. You may have received specific information, depending on the medication you are receiving, related to the time it should take you to push it in.

    Some patients may have a flow control device in their IV tubing that allows the fluid or medication to run in at a prescribed rate. This allows you to “dial in” the speed at which the infusion will drip.
    IV Infusion
    1. You will line up the blue line with the rate at which the infusion should flow. This picture show the device turned to the “off” position.
    IV Infusion
    2. This picture illustrates the device turned to 125. This means that your infusion will flow at a rate of 125ml per hour.
    IV Infusion
    3. This picture shows the device turned to “open.” This setting would typically be used to flush or prime the line. You will see the fluid running quickly in the drip chamber.
    If you are receiving more than one infusion throughout the day, you may use the same IV tubing, with some provisions. The medication you infuse through the same line must be the same. If you are infusing different medications, then you will need to use a different tubing for each one. You may not use the same tubing longer than 24hrs. The exception to this is if you are infusing fluids continuously (without interruptions.) In this case, you may use the same tubing for 72hrs. If you are infusing TPN, the tubing is changed with every bag, typically every 24hrs.

    If you are interrupting your infusions and can use the same tubing, it is very important to keep the end of the tubing sterile. The tip that plugs in to your connector must not touch anything else. To maintain the sterility of the end of the tubing, you will need to use an end cap.
  • 1. Wash your hands.
  • end cap in sterile packaging
    2. Your end cap will come in sterile packaging. Peel back the paper, and leave the cap in the plastic.
    IV Line
    3. At the end of your infusion, unplug the IV from your connector and place the end cap on the tip of the tubing.
    IV Bag
    4. Leave the empty IV bag connected to your tubing. Coil the tubing so that the tip with the cap is protected and not dragging on the floor. Flush your IV as directed.
    5. When it is time for your next infusion, simply take down the used bag and spike your next bag with this tubing, following those directions.
    Infuserve America Logo white
    facebook iconx iconyoutube icon
    chevron-down